Final Presentation – Spencer Barton

The Black Box

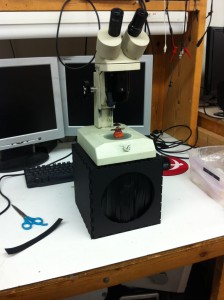
Put your hand into the black box. Inside you will find something to feel. Now take a look through the microscope. What do you feel? What do you see?

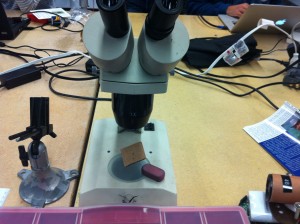
The Box and Microscope

2013-11-19 20.00.16

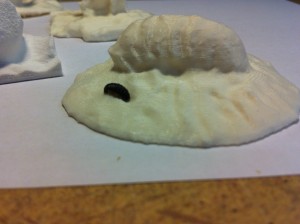
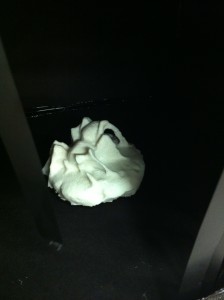
Inside the Box

2013-11-19 19.43.03

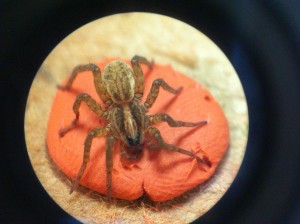
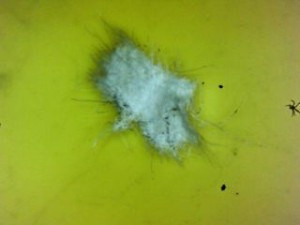
Under the Microscope

2013-11-17 00.03.12

When we interact with small objects we cannot feel them. I can hold the spider but I cannot feel it. The goal here is to enable you to feel the spider, to hold it in your hand. Our normal interaction with small things is in 2D. We see through photographs or a lens. Now I can experience the spider though touch and feel its detail. I have not created caricatures of spiders, I copied a real one. There is loss of detail but the overall form is recreated and speaks to the complexity of living organisms at a scale that is hard to appreciate.

The box enables the exploration of the spider model before the unveiling of the real spider under the microscope. The box can sense the presence of a hand and after a short delay, enabling the viewer to get a good feel of the model, a light is turned on to reveal the spider under the microscope.

Explanation of the Set-up

The Evolution of Ideas

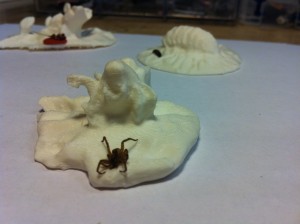
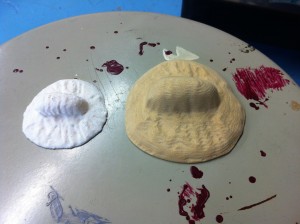
As I created the models I found that my original goal of recreation was falling short. Instead of perfect representations of the creatures under the microscope, I had white plastic models that looked fairly abstract. The 123D models were much more realistic representations because of their color. My original presentation ideas focused around this loss of detail and the limits of the technology. However, what I came to realize was were the strengths of the technology lay: the recreation of the basic form of the object at a larger scale. For example someone could hold the spider model and get a sense of abdomen versus leg size. Rather then let someone view the model I decided to only let them feel the model.

Feedback and Moving Forward

The general feedback that I got was to explore the experience of the black box in more depth. There were two key faults with the current set-up. First the exposure of the bug under the microscope happened too soon. Time is needed for the viewer to form a questions of what is inside the black box. Only after that question is created should the answer be shown under the microscope. The experience in the box could also be augmented. The groping hand inside the box could also be exposed to other touch sensations, it could activate sound or trigger further actions. The goal would be to lead the experience toward the unveiling. For example sounds of scuttling could be triggered for the spider model.

The second piece of feedback lay with the models themselves. First it was tough to tell that the model in the box was an exact replica of the bug under the microscope. The capture process losses detail and the model creation through 3D printing adds new textures. The plastic 3D models in particular were not as interesting to touch as the experience was akin to playing with a plastic toy.

To recognize and rectify these concerns this project can be improved in a few directions. First I will improve the box with audio and a longer exposure time. Rather then look through the microscope I will have a laptop that displays the actual images that were used to make the model. The user’s view on this model with then be controlled by how they have rotated the model inside the box.

I will try another microscope and different background colors to experiment with the capture process and hopefully improve accuracy. I will redo the model slightly larger with the CNC. MDF promises to be a less distracting material to touch. Additionally the fuzziness of MDF is closer to the texture of a hairy spider.
Final Project Milestone 3 – Spencer Barton

3D Printer,Final Project,Instrument,Rhino3D,Scanning — spencer barton @ 8:47 pm

Model Making

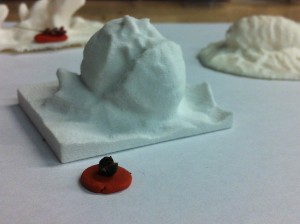
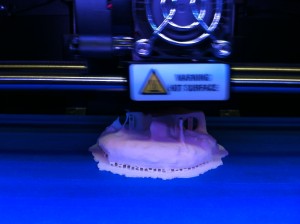
I have begun to create models. The current models utilize additive methods: one with plaster printing (thanks to dFab) and PLA printing with a Makerbot in Codelab. I also utilized the Art Fab CNC to make a slightly larger rolly polly. Some of the below models are shown with the original object that I used for the capture.

2013-11-17 17.53.01

2013-11-17 18.06.09

2013-11-17 17.55.04

2013-11-17 18.08.14

2013-11-23 13.54.47

2013-11-23 13.54.20

2013-11-18 22.59.09

Final Project Milestone 2 – Spencer Barton

Final Project,Rhino3D,Scanning — spencer barton @ 12:34 am

A Walk in the Woods

In the first milestone I defined five options for objects to capture. I decided to go with ‘A Walk in the Woods’:

I grew up playing in the woods. It was always an adventure – new bugs lay under every rock and dirt could be molded into innumerable forts. I have gradually left the woods behind (as I imagine most of us are doing these days). My goal is to take a simple walk through the woods and record any and all interesting discoveries that I make. These critters, rocks and leaves would then be created as physical models to capture some of that excitement of discovery.

Captures and Lessons Learned

I have performed a number of captures now, some with great success and others with less.

I have a few pointers for capture:

  • Lighting if important. Diffused light works better then a spotlight. Captures did well with just the microscope light on.
  • The angle of capture cannot be too deep. The objects did best at 30-45 degrees.
  • The object surroundings are very important as background objects help the software orient the images. Latter models all have orange clay bases for support and textured background.
  • 30x magnification worked well for the objects that I had. Captures work best when the capture can see a wide range of the object’s surroundings
  • Taking pictures at different focus depths came out well.
  • The more pictures the better. I usually took 40-70.
  • Shiny objects don’t do as well
  • Small details like bug legs are rarely captured.

Here are some of the results (all models available on my 123D account):

Future Steps

The next hurdle is manufacturing. I am exploring two options. One in 3D printing in plaster. The d-fab on campus has the ability to print color plaster models.

I am also looking into 123Dmake which converts designs to layered models which can then be cut in something like cardboard. This would enable me to create some very large models.

Final Project Milestone 1 – Spencer Barton

Final Project,Scanning — spencer barton @ 8:00 am

The Project

Our world is defined by what we see. However beneath our feet exist an enormous and elaborate system of creations. With the aid of a microscope and camera I am seeking to recreate through 3D modeling the millimeter scale for the centimeter scale that we live in. This project is enabled by key advancements in 3D modeling software such at Autodesk’s 123D Catch.

The process for capture is fairly simple. A series of photographs are taken of an object from every direction. These photographs are stitched together and distance is interpolated resulting in a 3D model. The chair model below is a good illustration. About 40 photographs were taken from a variety of angles and then uploaded to 123D Catch.

Chair Test

Milestone 1

The goal of my first milestone was to create a functioning 3D scanning jig as well as perform some research into objects to capture.

Scanning Jig

The scanning jig is based around a microscope. I began with a usb microscope, but it quickly proved not to have the necessary image resolution.

Example of the USB microscope:

t4

The Original Microscope Jig

I discovered that my iPhone camera was high enough resolution with the added advantage of being easy to work with. I got hold of a microscope from the robotics club and set-up a few tests holding my camera to the lenses. I created a rotating stand for the object with a LEGO piece, tape and cardboard.

2013-10-23 20.52.32

Lessons Learned

From this first prototype I learned that it important to have a textured surface for the rotating base. The 3D capture software relies on picking out key points in each photo, so a textured base provides more unique points for the software. I also discovered the importance of a stable camera. The model below turned out poorly as camera jitter made depth interpolation difficult.

Piece of Solder

Upgraded Jig

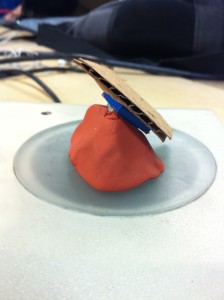
The first jig was upgraded first with the use of magic arms for camera stabilization as well a a sturdier turning base. The base utilized the same LEGO piece but was planted in clay in order to make the assembly flexible. I wanted to be able to change platform height and angle easily.

The Photo Platform

2013-10-28 19.48.20

Jig Results: Acorn

What to Capture?

5 ideas on interesting things to capture. I will pursue one or more.

Food

Food doesn’t always look as nice close up. This project would provide a new perspective on good food at a new scale.

Chewed Gum

2013-10-28 20.26.19


A walk in the woods

I grew up playing in the woods. It was always an adventure – new bugs lay under every rock and dirt could be molded into innumerable forts. I have gradually left the woods behind (as I imagine most of us are doing these days). My goal with this track would be to take a simple walk through the woods (Schenley Park) and record any and all interesting discoveries that I make. These critters, rocks and leaves would then be created as physical models to capture some of that excitement of discovery.

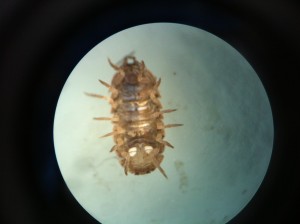
A Rolly-polly Bug

2013-10-28 17.29.52


Surfaces

We have a good sense of how a surface might feel, but how does touch translate to the physical look of a material? Surfaces would be recreated in larger scale so that roughness becomes visibly rough and the finer details of materials like velcro can be seen.

Velcro

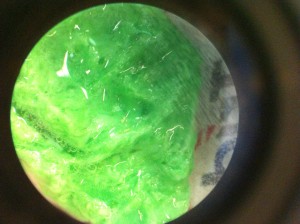
2013-10-28 20.18.29

Close-up

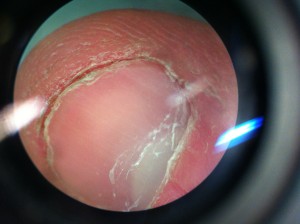
Inspiration for this track comes from hyper-realism. The goal here is to take a close-up look at less elegant human features. Following the lead from Ron Mueck, these captures would transformed into larger then life models.

A Fingernail

2013-10-28 19.09.35

Fluids

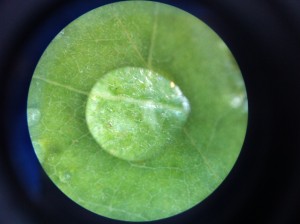
Water forms differently on different surfaces. This track would explore the interaction between water on various surfaces and under varying conditions (heat, vibration, pressure, sunlight). As a comparison other fluids such as oil could be used. 3D modeling is particularly interesting as the liquids would be forming distinct forms in 3 dimensions and not just in profile. 3D printing would be a viable option as the form matters more then material in this case.

Water on a Leaf

2013-10-28 17.25.13

Final Project Proposal – Spencer Barton

Assignment,Final Project,Modelling,Scanning — spencer barton @ 11:46 am

Assignment 2: “Footprints” by Rob Kotcher & Spencer Barton (2013)

Assignment,Software,Submission — spencer barton @ 9:20 pm

youtu.be/yClIkoxqSas&w=500&h=375

As we traverse our world we leave a trail. These paths
tell a story about from where we came and where we are
headed. As much as these paths are of our own free
will, they are also a product of the intentions of
those around us. With footprints we explore these
individual paths and in turn manipulate them through
subtle actions. Our intentions force the creation of
an all seeing eye which only we as the controllers and
observers are aware of.

Our camera watches from above recording motion with a
tracking algorithm while those below walk unaware. We
record motion by looking at frame differences which
then translates to activity. As a space becomes more
active it goes from blue to red.

Clone our git repo:
github.com/sbarton272/footprints.git

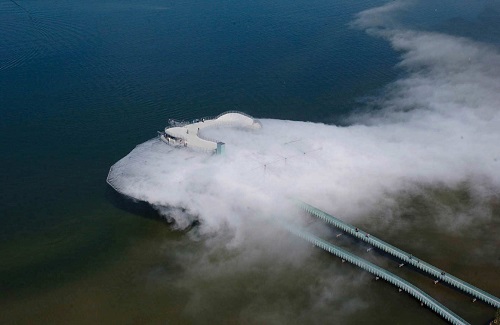
Instrument: “The Blur Building” by Diller + Scofidio + Renfro (2002)

Instrument,Reference — spencer barton @ 5:23 pm

blur building

More…

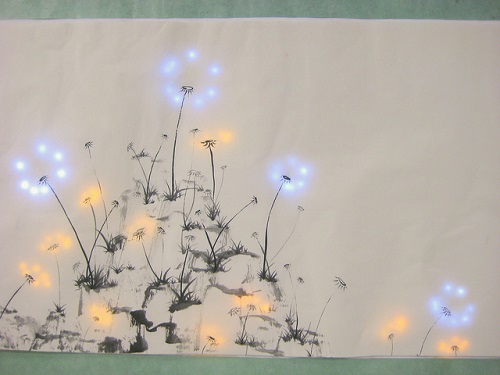
Instrument: “Pu Gong Ying Tu” by Jie Qi and John Clifford (2012)

Instrument,Reference — spencer barton @ 4:22 pm

Pu Gong Ying Tu

More…


Instrument: “Pygmies” by Aparna Rao and Søren Pors (2009)

Instrument,Reference — spencer barton @ 4:09 pm

pygmies

More…

This work is licensed under a Creative Commons Attribution-Noncommercial-Share Alike 3.0 Unported License.
(c) 2024 Hybrid Instrument Building 2014 | powered by WordPress with Barecity