Final Project “TAPO”: Liang

TAPO: Speak Rhythms Everywhere

Idea Evolution:

This project comes from the original idea that people can make rhythms through the resonant property and material of cups and interacting with cups. However, as the project progresses, it is more interesting and proper for people to input the rhythms by speaking than do gestures on cups. It also extends the context from cups to any surface because of the fact that each object has resonant property and specific material. So, the final design and function of TAPO have a significant change from the very raw idea. The new story here is:

“Physical objects have resonance property and specific material. Tap object gives different sound feedback and percussion experience. People are used to making rhythms by beating objects. So, why not provide a tangible way not only allowing people to make rhythms with physical objects around she/he, but also enriching the experience by some computational methods. The ultimate goal for this project is that ordinary people can make and play rhythms with everyday objects, even perform a piece of percussion performance.”

Design & Key Features:

TAPO is an autonomous device that generates rhythms according to people’s input (speech, tapping, making noise). TAPO can be placed on different surfaces, like desk, paper, ground, wall, window… With different material and the object’s resonant property, it is able to create different quality of sound. People’s input gives the pattern of rhythm.

System diagram

a) voice, noise, oral rhythm, beat, kick, knock, oral expression… can be the user input

b) using photo resistor to trigger recording

c) get rid of accelerometer, add led to indicate the state of recording and rhythm play

Hardware

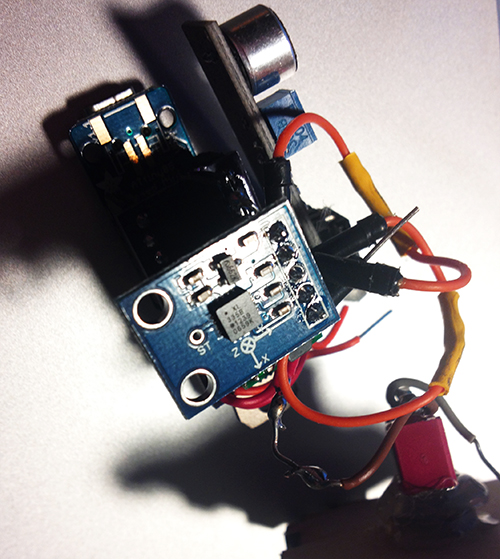
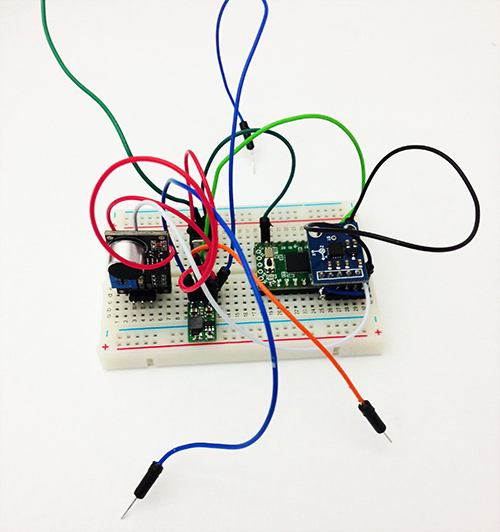
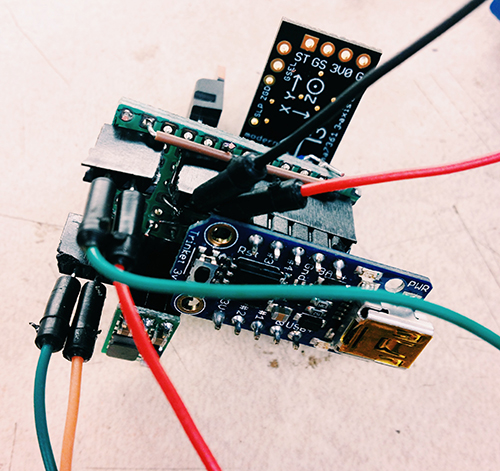
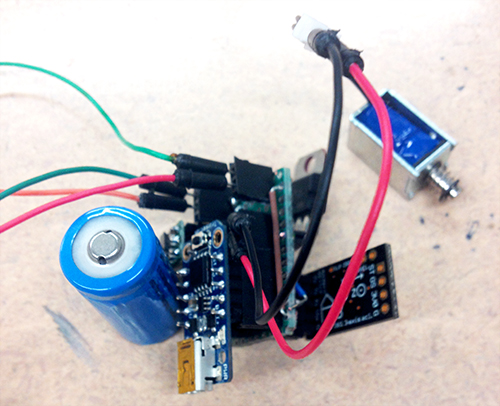
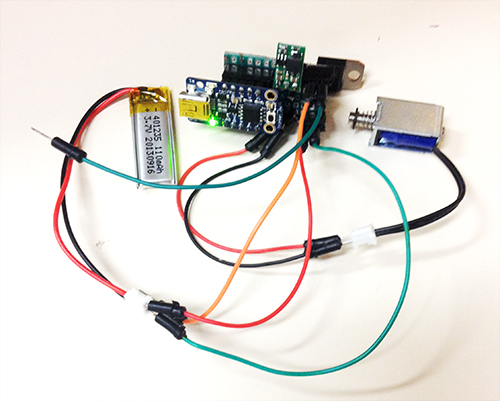
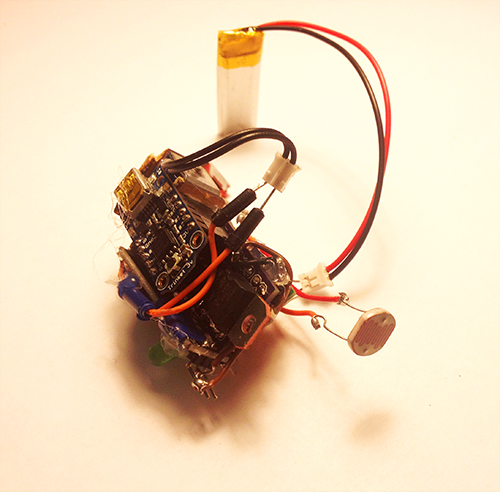
It is composed of several hardware components: a solenoid, a microphone electret, a transistor, a step-up voltage regulator, a Trinket board, a colourful LED, a photocell, a switch and a battery.

photo1


photo2


Fabrication

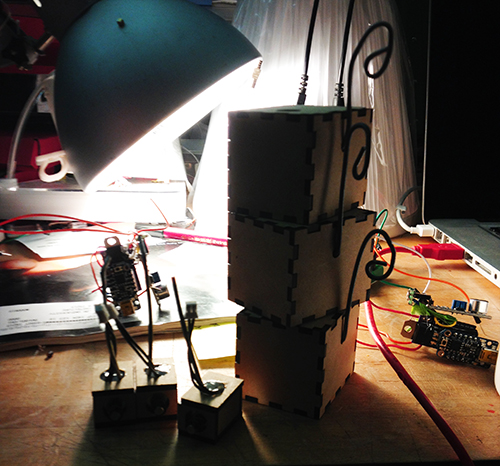
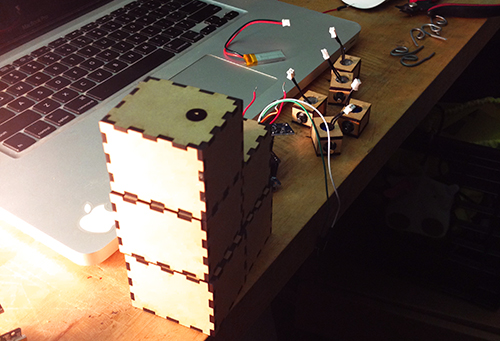
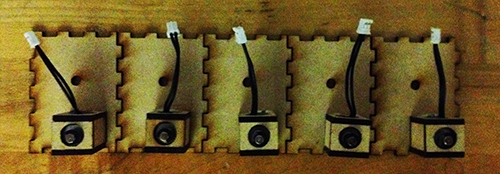
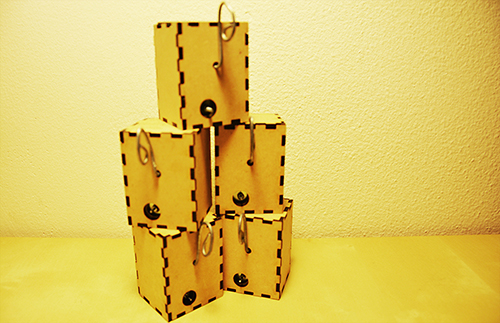
I used 3D printing enclosure to package all parts together. The holes with different sizes on the bottom are used for different usage, people can mount a hook or a suction. With these extra tools, it can be places on any surfaces. The other big hole is used for solenoid to beat the surface. The two holes on the top  side are used to show microphone and LED light separately. On each side, there is a hole for photo resistor and switch.

photo3 photo4

TAPO finally looks like this:

photo6 photo5 photo7 photo8 photo9

Demostration:

Final introduction video:

Conclusion & Future Work:

This project gives me a lot more than technology. I learn about how to design and develop a thing from a very raw idea, and keeping thinking about its value, target users, and possible scenarios in a quick and iterative process. I really enjoy the critique session, even though it is tough and sometimes makes me feel disappointed. The positive suggestions are always right and lead me to a high level and more correct direction. I realise my problems on motivation, design, and stroytelling from these communications. Fortunately, it gets much more reasonable from design thinking to value demonstration. I feel better when I find something more valuable and reasonable comes up in my mind. It also teaches me the significance of demonstrating my work when it is hard to describe and explain. In the public show on Dec. 6th, I found people would like to play with TAPO and try different inputs, they are curious about what kind of rhythm TAPO could generate. In the following weeks, I will refine the hardware design and rich the output (some control and digital outputs).

Acknowledge:

I would like to thank very much Ali Momeni for his advices and support on technology and idea development, and all the guest reviewers who gave me many constructive suggestions.

Final Project Milestone #3: Liang

Final Project,Laser Cutter,Rhino3D,Sensors — lianghe @ 2:23 am

1. My boards arrived!!

After about 12 days, OSH Park fabricated and delivered my boards. Yes, they are fantastic purple and look like exactly what I expect. I soldered and assembled every components together to test the board. Finally, all boards work with all the components but the transistor. I used smaller one instead of TIP 120. For some reason, it could work with Trinket board. So, I used TIP 120 again with my final board.

photo


2. Add Microphone Module!

To solve the problem of gestures and how user interacts with cup and Tapo, I decided to use a microphone to record user’s input (oral rhythm, voice, and even speech). The idea is quite simple: since the electret microphone turns analog voice data into digital signal, I can just make use of the received signal and generate certain beat for a rhythm. That is more reasonable interaction for users and my gestures can be put into two categories: trigger the recording and clear the recorded rhythm. The image below shows the final look of the hardware part, including the PCB board, Trinket board, transistor, step-up voltage regulator, solenoid, accelerometer, electret microphone, and a switch.

photo

photo1


photo2


3. Fabrication!

All parts should be enclosed in a little case. At the beginning I was thinking of 3D printing a case and using magnets to fix the case on the cup. I 3D printed some buckets with magnet to see the magnetic power. It seemed not very well in attracting the whole case. The other thing looks difficult for 3D printing case was that it was not easy to put the entire hardware part in and get it out.

photo copy

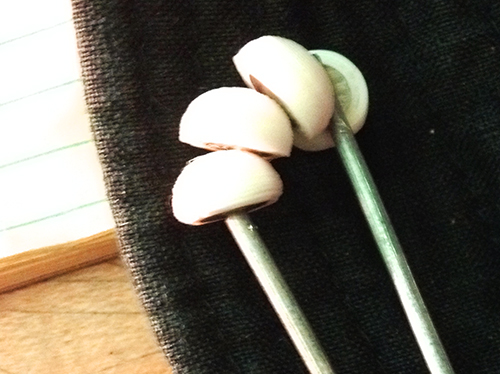
Then I focused on laser cutting.  I created a box for each unit and drilled one hole for solenoid, one hole for microphone and a hole for hook. I experienced three versions: the first one left one hole for the wire of solenoid to go through, thereby connecting with the main board. But the solenoid could not be fixed quite well (I used strong steel wire to support it); The second version put the solenoid inside the box and opened a hole on the back facet, so that it could tap the cup it was mounted on, but the thickness of the box avoided the solenoid to touch object outside; In the final version I drilled a hole on the upper plate for the switch, and modified the construction for solenoid.

photo

photo copy


Version 1

photo copy

Version 2

photo copy

Solenoids

DSC_0110 copy1

Version 3

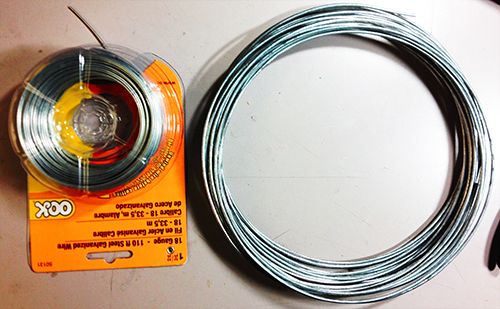
Another thing is the hook. I started with a thick and strong steel wire and resulted in that it could not be bended easily. Then I used a thinner and softer one, so that it could be bended to any shape as the user wished.

photo copy

4. Mesh up codes and test!!

Before program the final unit, I programmed and tested every part individually. The accelerometer and the gestures worked very well, the solenoid worked correctly, and I could record user’s voice by microphone and transferred it to certain pattern of beats. Then the challenge is how to make a right logic for all the things work together.  After several days’ programming, testing, debugging, I meshed up all logics together. The first problem I met was the configuration of Trinket, which led to my code could not be burned to the board. Then the sequence of different module messed up. Since the micro controller processed data and events in a serial sequence, so the gesture data could not be “timely” obtained while the beats of solenoid depended on several delays.

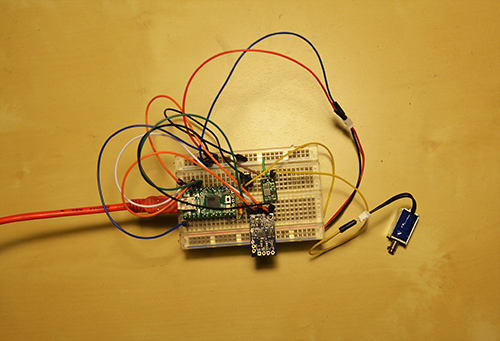
I built a similar circuit, in which my custom PCB was replaced by a breadboard, to test my code. In the test, I hoped to check if my parameters for the interval of every piece of rhythm was proper, if the data number of the gesture set was enough to recognise gestures, if specific operation causes specific events, and most importantly, if the result looked good and reasonable.

Here is the test unit:

photo copy

Here is a short video demo of the test:

Final Project Milestone #2: Liang

Uncategorized — lianghe @ 11:06 pm

According to design critique from three guests, I rethought the scenarios and target user group. Instead of making tempos, I believe Tapo could produce more for users, for example, rhythms. Yes, with different cups and different resonance, it could generate various rhythms. Imagine multiple users play together, it would be a playful and generic environment for participants to make original rhythms with very original sounds and tempos. As for the target users, I think they depend on the situations where Tapo could fit in. For educational goals, it could be applied in a classroom, teaching students basic process of making rhythms and the connection between the sound and the physical properties of the cup. If it is set up in an public space, it encourages people to play and enjoy the process of making rhythm. So I believe it has great potential in people’s everyday activities. Based on the circuit I built I set up one prototype (actually two prototypes and the first one failed) to test if it runs correctly. Below images show how the prototype looks. Besides testing all components on the board, I also test batteries. In the board I set two separate interfaces for batteries which supply power for the trinket board and the extra solenoid individually. However, test demonstrated that only one battery worked well with all parts. Therefore, I finally selected one small LiPo as the only one power supply.

Processed with VSCOcam with c1 preset milestone_2_2 milestone_2_3

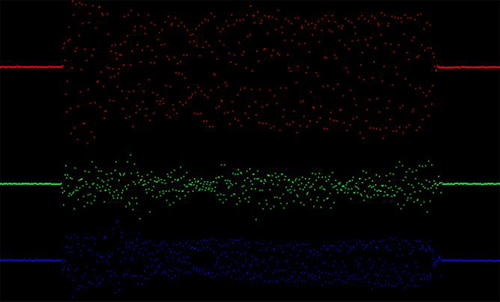
Another work is about gesture detection and recognition. At the beginning I took a complicated process to recognise user’s gesture. The entire solution is shown in the below diagram. The basic idea: The data of X-axis, Y-axis and Z-axis from accelerometer are sent to the controller board. Everytime set a window for data set (it has to be 2^n, I give it 128). When the window is full, calculate these data to get mean value of each axis, entropy value of each axis, energy value of each axis, and correlation value of each two axises (more details about formula and principles please refer to Ling’s paper). Store the result in the form of arff file. Then in Weka import this file and use J48 algorithm to train a decision tree. There are two parts in gesture recognition: gesture recognition model training and test. With different user’s gesture data and above process I could make a decision tree. More tester’s data makes it more robust and accuracy. Then when recognising one gesture, it follows above process but not produces arff file, instead, directly process data and send the result to the trained decision tree, and the classification tells the category of the gesture. I finished a Processing application to visualise the data received from the accelerometer and distinguished four gestures: pick-up, shake, stir counter clockwise, and stir clockwise. I used pick-up gesture to trigger the entire system. Shake gesture can be used to generate random predefined rhythms. Stir counter clockwise means slow down the speed of rhythms. Stir clockwise means speed up rhythms. Below shows the data variation of each axis in different gestures.

GESTURE-1

Pick-up gesture

GESTURE-2

Stir counter clockwise gesture

GESTURE-3

Stir clockwise gesture

GESTURE-4

Shake gesture

With this method it has one several limitations: a) it needs triggers to start and terminate the gesture detection process; b) two types of stir gestures are not well distinguished; c) since it collects a large number of data it causes delay. In addition, the mapping between the stir gestures and the control of speed of rhythms is weird and not natural. So I adapted another much simple and direct way to test gestures. Since user’s interaction with cups just lasts at most a few seconds, I used 40 data (every 50ms receiving X, Y, Z data) to detect only two gestures: shake and pick-up. The mapping remains the same. The device would be mounted on the cup, so I tried to monitor the data of the axis which is perpendicular to the ground. If the value reaches the threshold that I set, and the other two axises remain stable, it will be regarded as pick-up gesture. To simplify the process, the other conditions are considered as shake gestures. The only problem goes to what kind of interaction and input should exist in this context?

Here is a short demo of gesture recognition:

Final Project Presentation: Liang

Final Project,Laser Cutter,Sensors — lianghe @ 2:52 am

The final project goes wrong with Pin conflict on Trinket. Since I use Pin #1 to read microphone’s digital data and Pin #2 (Trinket requires “1”, which means A1, instead of “2” in code) to read analog X-axis accelerometer data,  it gets confused when I have to write the same command “PinMode(1, INPUT);” in the code to execute both data read. It leads to the failure of reading microphone and accelerometer at the same time. Annoyingly, I had to use Teensy at the very last minute instead to perform my demo. It was not robust and that good, and very preliminary. I felt sorry for the audience and reviewers that night. However, they gave me a lot of feedback and suggestions on potential revise and development. Here I sum up some key points:

1. My biggest problem is that I attempt to cover many scenarios and applications, which is so generic that confuses audiences and eventually lose its value. It fails to address the major problem it tries to figure out, or the goal for its exist. It throws abstract pictures to audience, leave alone under the situation that it cannot work.

2. The gesture seems weird since the microphone works part the role of the gesture. I would argue that the gesture is kind of the way people feel the liquid in the cup. Honestly, when I design the gesture, I find only one gesture (shake) is meaningful for people.

3. Other formations. No matter what kind of stuff I want to create and make, it should respect my motivation and its goal. So, again it goes back to “Point #1”.

I agree with most of the comments in the critique and they drive me recall my original motivation: I know cup has resonance with liquid, cup has material, people use cup, and it can be an instrument to perform music. In the past weeks, I continue to do some research how to make use of these characters and what kind of music it can generate. Here I have some answers: it can generate beats, then rhythm, so it can perform some kind of percussion performance. Besides cups, other objects also have resonance property. When I look back at these, I narrow down my scenario for Tapo and come up with a new but iterative design and development solution.

Redefine the story for TAPO

Physical objects have resonance property and specific material. Tap object gives different sound feedback and percussion experience. People are used to making rhythms by beating objects. So, why not provide a tangible way not only allowing people to make rhythms with physical objects around she/he, but also enriching the experience by some computational methods. The ultimate goal for this project is that ordinary people can make and play rhythms with everyday objects, even perform a piece of percussion performance.

Final Project Milestone #1: Liang

Assignment,Final Project,Hardware,Sensors — lianghe @ 5:21 am

Project: Tapo

Tapo is a tangible device encouraging people to create beats and perform percussion music with daily cups. What kind of beats it can produce? The volume of the liquid in the cup, the material of the cup and how people interact with the cup matter. The pitch and the timbre depend on the resonant property and the material of the cup. People’s gesture decides the speed or the pattern of the beat.

In the past one and a half week I accomplished every items listed for my first milestone.

1. System Design: I sketched the whole system design and labeled every component in the sketch.

system


2. Basic Diagram: Based on the system design, I finished the system diagram.

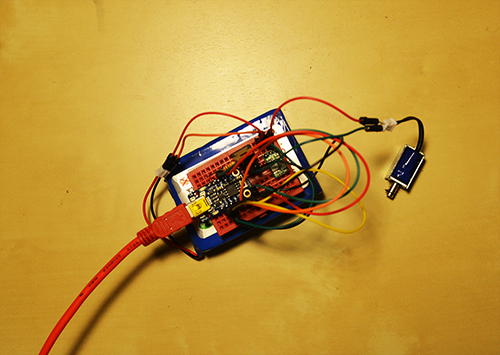
3. Quick Prototype: I have finished two prototypes so far. One is composed of a Trinket, a 1K resistor, a step-up regulator, a transistor (TIP 120), an accelerometer, a solenoid and a battery. The other one is different from this one by using a Teensy and a smaller transistor (FU3910) instead. These two prototypes are currently supported by a big battery set and USB power supply. In the final version I will replace by two separate batteries supporting the micro controller and the solenoid, also use all the tiny components in one enclosure. The Trinket version almost has the final look of this project except for the transistor and the batteries. However, the cheap board Trinket does support the Serial debug. Therefore, I built the second prototype by Teensy for the next phase: gesture’s detection with accelerometer.

milestone_pic1

Prototype 1

milestone_2

Prototype 2

The prototype 1 is implemented to test the solenoid and the prototype 2 combines solenoid and accelerometer, which converts the data of accelerometer into the speed of the solenoid. Both prototypes are testified that solenoid, accelerometer and the entire hardware configuration can work.

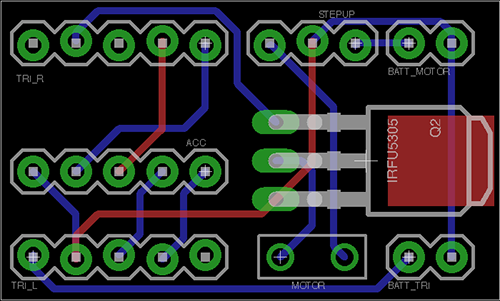
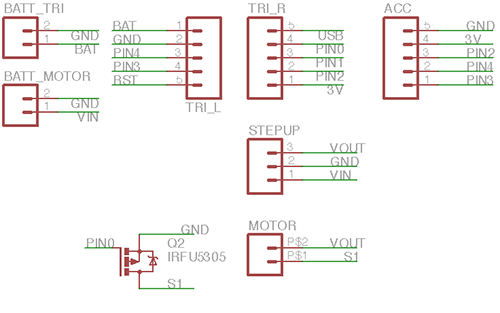
4. Circuit Design: In order to produce multiple devices, I customised a PCB board for all the hardware components, including batteries ports, solenoid interface, transistor, resistor, step-up regulator, and accelerometer.

PCB_final PCB_Schematics


5. Component Purchase: I did a research on every component I would use in this project and test several transistors and boards, listed a budget for the hardware that I need. I have all the parts at hand for just one prototype. Here is some links of my wanted components:

Trinket: www.adafruit.com/products/1500

Batteries: www.amazon.com/gp/product/B006N2CQSS/ref=oh_details_o00_s00_i00?ie=UTF8&psc=1

www.adafruit.com/products/1570

Solenoid: https://www.sparkfun.com/products/11015

Touch & Activate: Adding Interactivity to Existing Objects using Active Acoustic Sensing

Uncategorized — lianghe @ 9:45 pm

This is one of the best paper of UIST 2013, which shares common original idea with my final project.

Final Project Proposal – Liang He

Interesting Project with Ferro Liquid

Instrument,Reference — lianghe @ 8:32 pm

Wine PEG Application

Instrument,Reference — lianghe @ 7:45 pm


Other projects about glass harmonica: link

Assignment 2: “ProSound” by Liang He and Ding Xu (2013)

Assignment,Submission — lianghe @ 9:52 pm

IMG_1111

ProSound is an instrument that explains “Proxemics” theory by altering lights and audio to the audience. It is composed of a 3D priented enclosure, infrared proximity sensors, a LED, and Arduino. Its size is  4 inch (height)*3.5 inch (width) and it looks like a semitransparent bottle with three “eyes”. Proxemics introduces four types of interaction spaces: intimate space, personal space, social space and public space. In ProSound, we hope to detect three spaces: personal space, social space and public space. Through the central proximity sensor it can detect the distance between the user and the bottle, indicating what space the user is staying at. It will changes LED’s colours and the loudness of the sound according to the distance. In addition, when the user stay at the social space, which means the normal interaction space, ProSound records user’s speech and repeats it again and again. A piece of midi clip is playing when user interact with the bottle. The user is able to control the speech’s pitch and the interval of the midi clip by approaching the proximity sensors on both sides by hand. Our project is aimed to deliver the concept of “Interaction Space” through user’s interaction with ProSound. We hope users understand the principles of Proxemics in playing with ProSound and the magic things they can make with space.

Next Page »
This work is licensed under a Creative Commons Attribution-Noncommercial-Share Alike 3.0 Unported License.
(c) 2024 Hybrid Instrument Building 2014 | powered by WordPress with Barecity