I took a picture of my mouth and iterated the transformation in Photoshop. Then I traced it in Inkscape. Then I imported to Illustrator in order to import into Rhino (because Rhino surprisingly does .ai but not .svg). I chose a spiral because I find spirals tend read the same way in 3D as they do in 2D, so this sort of graffiti stencil-type image would also make sense as a physical object.

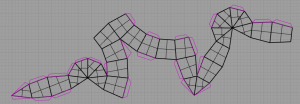
This is a trace of my hands making a bull or goat shadow puppet. I used the same workflow of camera->PS->Inkscape->Illustrator->Rhino. The two pieces correspond to my two hands. They are meant to be cut out of slightly differently-colored acrylic in order to read as a contiguous silhouette while still hinting at the origin of the shape.

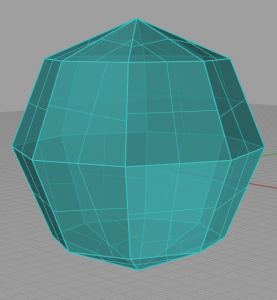
This is a simple geometric box that I created by drawing a sphere in Rhino then changing it to a mesh with a very small number of polygons.

I created planes from the mesh and unrolled the planes to form a template. Then I added in tabs so that I could fold it up and glue it together.

Algorithmic design for laser cutting:

Other design based on an object from life:

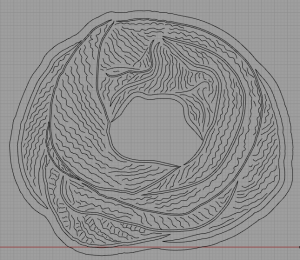
I used my large, red scarf as the basis for this design. I really like it.
Design two boxes with the following design specifications:
ONE
- a single material with the following properties
- Length + Width + Height less then 18 inches
- no hardware necessary
- visually communicates its purpose
TWO
- made of two different materials
- Length + Width + Height less then 18 inches
- composed of “Skeleton” and “Skin”
LEFTOVERS
- if you haven’t registered for an account on this side, do
- if you haven’t filled in a complete profile for your account (name, contacts, photo), do
Two designs, in Rhino, to be laser cut (keep it under 24″ x 18″)
- Algorithmic: Start with a basic shape, repeat a process systematically (e.g. the repeated diminution exercise in class). Make the necessary adjustments in the model to allow it to be laser cut.
- Based on the real world: take a top-down (bird’s eye) perspective photograph of a real-world object, import the image into “Top” transport of rhino, and model it with lines and curves; make the necessary adjustments in the model to allow it to be laser cut.
- In both exercises, consider what material you would use and why.
- Upload both models to Black board before Monday morning’s class.
NB 1. When there’s a length or an option, you can type it (if you can)
NB 2. Use a two button mouse, use a big/second screen (if you can)
drawing: (you can either click to draw or type the dimensions you want)
- points
- circle
- line
- rec
- polyline
- curve
measurements:
- length: length of line or curve
- distance: distance between two points
- area: area of a surface
geometric transformation:
- orient: good when the thing you’re moving is asymmetric/sided/chiral
- offset: scale and copy
- scale1D: good for resizing lines
- scale2D: good for resizing flat shapes
- scale (you can indicate with numbers the scaling factor)
- move
- copy
- arraycrv: orient and copy
2d-3d-2d:
- loft: make connecting surface between two lines/curves
- extrude
- make2d: create 2d shape of selected surface, according to current view
- unrollSrf: turn a volume into flat components
- dupBorders: produce curve from boundary of a surface
cutting/expanding:
- explode
- split: divides a line/curve/surface at a center point/line/intersective-surf/curv
- trim: split + delete
- extend
- rebuild
make many out of one:
- divide: dividing lines/curves into equal parts
- rebuild: either turn cuves into lines or make ugly curves pretty curves
housekeeping/getting-around:
- layer: show layers window (use many layers!)
- show/hide
- setPt
- zs: zoom set, show you just the selected object in the active transport
- join: make one curve out of many segements
- group
First
- Register for an account on this site (complete profiles please)
Begin with these video tutorials:
- An overview of the Rhino 4 user interface
- Basic object types in Rhino
Follow with Rhino’s built-in tutorial 1; see below for accessing that tutorial from within rhino:
- Getting Started [with Rhino] Webinar


